Top and Back
(Part 2)
By John Fisher
"I don't measure a man's success by how high he climbs but how high he bounces when he hits bottom."-General George Patton (1885-1945), American Army general
Time to Work on Carving the Inside of the Plates
I re-screwed the top to the wooden table to start carving out the inside. Although the dome of the top should just about touch the table when turned over like this I also wedged a cloth between the top and the table as an extra measure to cushion it while carving the inside of the top. I did the back plate in the same manner.
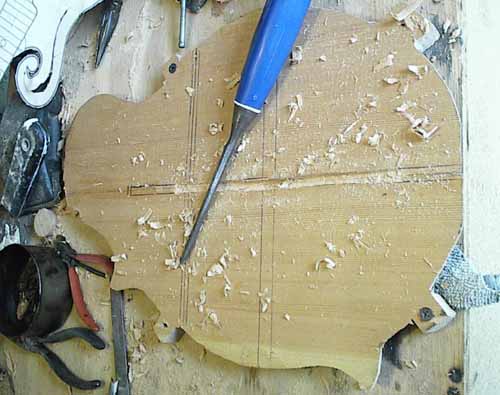
As you can see, I made grooves as depth guides along the length and also to the width similar to how I did the outside of the top and back. The main difference is that this time I had to use a thickness caliper to make sure the grooves corresponded to the thickness that the top will be.
Here I am using a small dovetail saw to cut the grooves which will then be chiseled out carefully to guide the thickness of the top and is done in the same manner in the back plate.

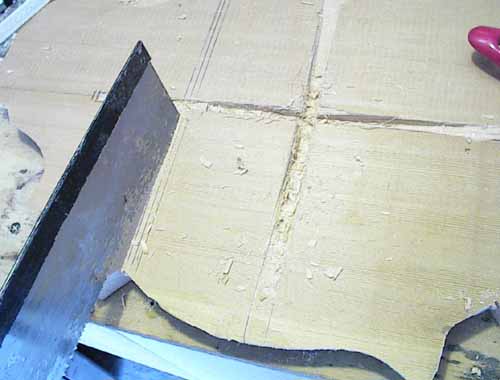
After the grooves were done, I began to remove the wood around it making it a wooded dish. The top was pretty easy to do but the hard maple back took a lot more work to cut.
Because the maple back plate is much harder, I used to router to some extent to remove some of the bulk. You really have to be careful as you don't want to make a mistake and accidentally go too far cutting into the other side.
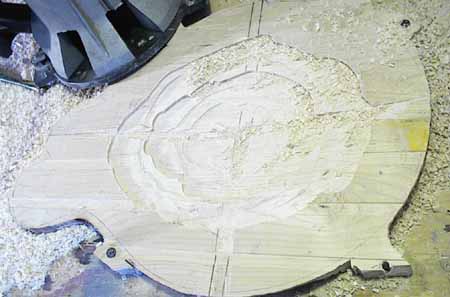
Here is the inside pretty much finished being carved out and shaped. Besides using a chisel to remove bulk wood, I also used the chisel as a scraper on a 90 degree angle to do some scraping using some force with 2 hands on the chisel, like you would a scraper. I then used a scraper that I ground a bit round to be able to adhere to the rounded dish shape of the inside. I then sanded the surface smooth starting with 80 grit paper working up to 220 grit sandpaper. I pretty much just followed the standard measurements of the thicknesses but then by tapping the wood occasionally I can tell whether the thickness was good for a lively resonate top. This is done by holding the top with 2 fingers while tapping it in different places with your middle finger of your other hand and listening to it. I have not received an explanation from anyone yet on how to systematically do this to obtain good results but it is just a matter of experience and to me, when it sounds right then I'm done. There are differences in different boards used but I don't stray too much away from the standard measurements of the thickness.
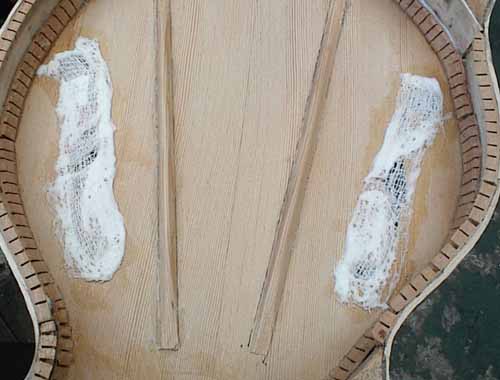
As you can see, I glued some normal surgical gauss with white glue on the F holes. When dry, I re-cut out the F holes. This is to strengthen the the top around the edges of the opening to prevent chipping of the delicate shape of the F hole. It is important to thoroughly saturate the gauss with the white glue to insure that there are no strings fraying out when the glue is dry. The gauss strips are about 1" wide. To view the position and layout of the F holes please refer to "The Top and Back" (part one) in this article.