Making the Top and Back
(part 1)
By John Fisher
Don't say you don't have enough time. You have exactly the same number of hours per day that were given to Helen Keller, Michelangelo, Mother Teresa, Leonardo da Vinci, Thomas Jefferson, and Albert Einstein."-H. Jackson Brown, Jr.
Here is the basic shape of the top. I used 2 pieces of Douglas Fir 3/4" thick about 5" wide that were glued together to make a 2 piece top. Note that when the binding is installed to the top, it will touch the tip of the crest at the end of the scroll. If you print out this picture and match it to the above dimensions using any photo editing program, the picture can serve as a template. For example, you can use "Photoshop" to get it to the correct scale.
These are some fairly standard dimensions for using spruce for the top. These dimensions are always debatable. I used Douglas Fir which is a slightly heavier or denser wood so I carved the thickness to about 10 to 15% thinner then these dimensions.
This is to give you and idea of the length view of the top and back plates. You will noticed that the center of the back plate is a bit thinner (3/16") then the Top plate. Please note again that I made the top a bit thinner then these dimensions while using "Douglas Fir".
Here I am gluing the 2 pieces of quarter sawn Douglas Fir together for the top. This was a board that I cut the length in half to make the 2 piece carved top. This is not booked matched but the wood grain was so even that it didn't make much of a difference in the finished appearance. I did put the finer grain of the 2 pieces in the middle which made the coarser grain near the out edges. It is good not to have the finished edge right on a grain as it will make the joint more noticeable with a thick grain line down the middle. The 2 boards when glued together are about 14" long and a little more then 10" wide and about 3/4" thick.
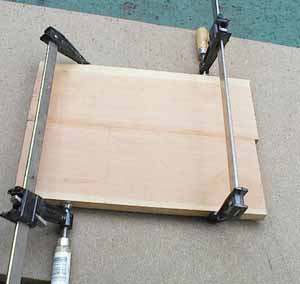
I sanded the 2 edges flat using a carpenters level with sand paper glued to it. I would hold the 2 edges together up to the light. When there was no light peeping through then I new it was flat and ready to glue. I glued it with white carpenters glue. I like white glue for this application because it dries transparent. I used 2 large clamps to glue it. 3 clamps would have been nicer but it still worked fine. You can see the excess glue on the joint which doesn't matter at this point as after it is carved the joint is almost unnoticeable.
I did the back almost in the same way except that the wood I used for the back was maple. The maple was much harder to carve then the soft Douglas Fir Top but my methods were basically the same in how it was carved. The maple back was not quarter sawn wood but it worked just fine and hey! someone just gave it to me for free.
In both cases I carved the outside first and then the inside. As you will see in the following pictures that when the top and back shape was cut out I left 4 little protrusions sticking out. This making the shape kind of like a turtle with 4 legs was to give something to hold the wood with while carving. I drilled a hole in each of the 4 protrusions so that I could temporarily screw the wood to the wooden work bench while doing the carving
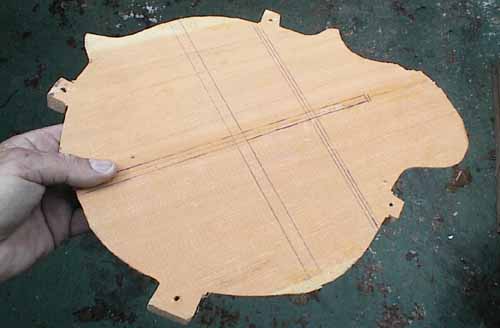
Here is the top that was cut into the rough shape. I left at least 1/8" extra all around that would later be trimmed to shape. You can see lines drawn that will be channels for depth guides.
Here is the the same situation as the previous picture, only this is the back that is made of maple floorboards. You can even see some of the grooves that were still left in the floor boards the way I received them that I hadn't removed yet. After screwing it to the table with the little protrusions I cut a channel around it with a router to where the bottom of the channel is about 3/16" thick. I used a 1/4" wide router bit. It is important to do this cut a little at a time. If you try to go too deep right away you will burn the router bit or even worse the router can lose control causing an accident and ruining your work. You will notice that I left about 1/4" of wood on the outside perimeter. This is to maintain a surface for the router base to sit on while doing the following cuts with the router.
As illustrated above with the brown lines: with just the rough shape of the top cut out and the router cut around the perimeter, I then cut grooves with a chisel that will serve as depth guides for shaping with a chisel and the removing bulk wood with the router. Some people drill holes with a drill at different depths as guides for carving. This method above works good for using a router to remove the bulk. The 2 vertical grooves serve as depth guides for the width of the top as in the picture further up on this page of the cross section of the top while the horizontal groove serves as a guide for the shape of the length of the top.
Here shows the grooves or channels I made with a chisel from the outer perimeter to the center of the top or back to mark the depth of the curved top as a guide. This will serve as a guide to know roughly how much to cut off with the router and with the chisel. I realized that you could probably do the whole bulk cutting with just a chisel but the router was useful to remove large masses of wood.

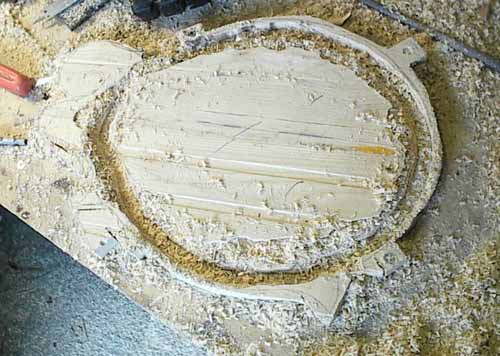
Here you can see that I removed a lot of wood from the back with a router. I used the grooves I made that are going towards the center as guides when resetting the depth each time around making shallower and shallower cuts as I worked towards the center. I used a 1/2" wide router bit for this and moved in about 3/8" at a time as I moved up a step. Like I said, the wood on the back was much harder then the front so that when I did the front that was much softer I used the chisel more to remove bulk wood as opposed to the router. In using the router it is important to go slow as if you accidentally move in to much while cutting you can mess up your work bad.
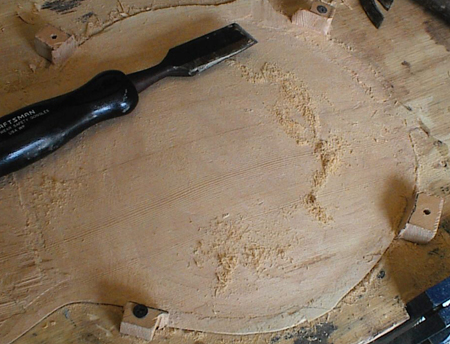
Here I am showing the top again. I used a chisel and a scraper to smooth things out. This may seem difficult but it is not nearly as difficult as I thought it would be. As you begin to shape things, things become more and more obvious and your moves become a lot more predictable and then that plain looking block of wood starts to transform into something.
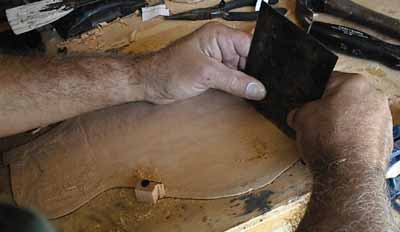
Here I am using a scraper to further smooth things out. I found myself sometimes even putting a 1 inch chisel at a 90 degree angle and using that as a scraper in some cases. This works good to remove good quantities of wood in smaller areas.
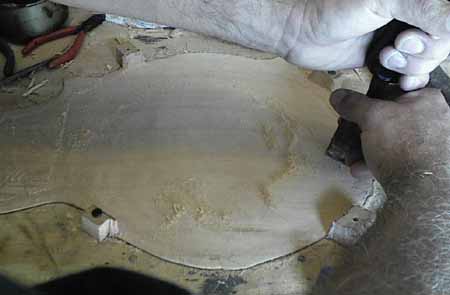
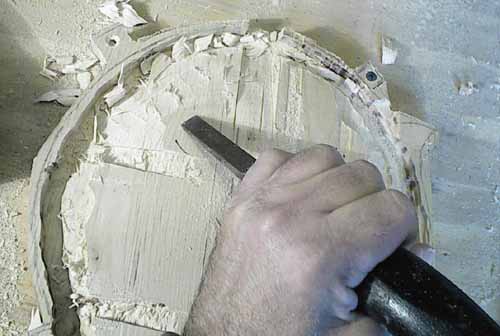
Here I am scraping the wood with a wood chisel at about a 90 degree angle. In order the make the re-curve shape that goes around the perimeter of the top and back it is best to use a chisel that has been ground slightly round for this.
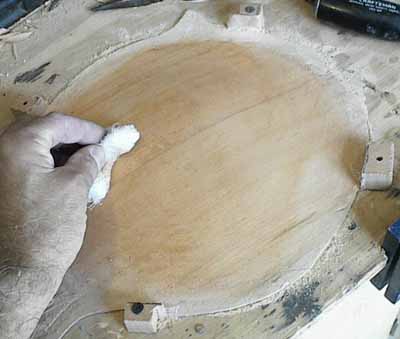
After I was pretty much satisfied with the shape of the top, I rubbed a wee bit of sanding sealer on the top. This is just to show you real quick where any flaws may be. The sanding sealer dries real quick and is easily sanded off. It is important to finish the outer surface completely before starting to carve out the inside of the top.
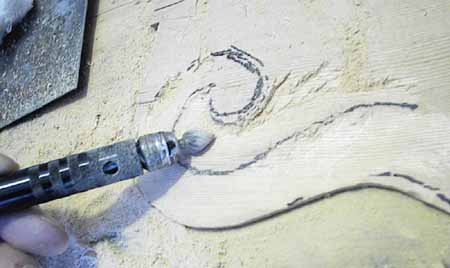
Here I am working on the scroll with a Dremel high speed drill. You don't need a Dremel tool to do this but it sure helps. When rough cutting the top, I left this area about 3/8" thick. The scroll is an unnecessarily extra chore but it does make the mandolin distinctly fancy although it's a bit of a pain to do. I first drew a line with a pencil where the crest of the scroll would be. The crest is the highest part of the scroll and I made it about 1/4" high. I had a bit of a problem trying to visualize the concept of all these shapes as I didn't have an F style mandolin in front of me to study and neither did I ever see one in real life so I had to write a lot of people bugging them with a lot of questions.
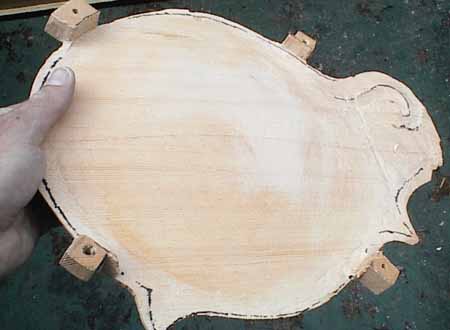
Here is the top almost shaped and almost ready to start carving the inside. As you can see I left the four feet on it so that when it is turned over to start carving the inside, I can conveniently screw it to the wooden work table again. You can see that I am still leaving the shape of the top with a bit of extra wood around it. This also helps to not chip up the outer perimeter of the top while carving the inside. Using the 4 feet idea was just an idea that I wanted to try although I found out later that for carving the tops of mandolins or arch top guitars, most people use a cradle to hold the top or back while carving.