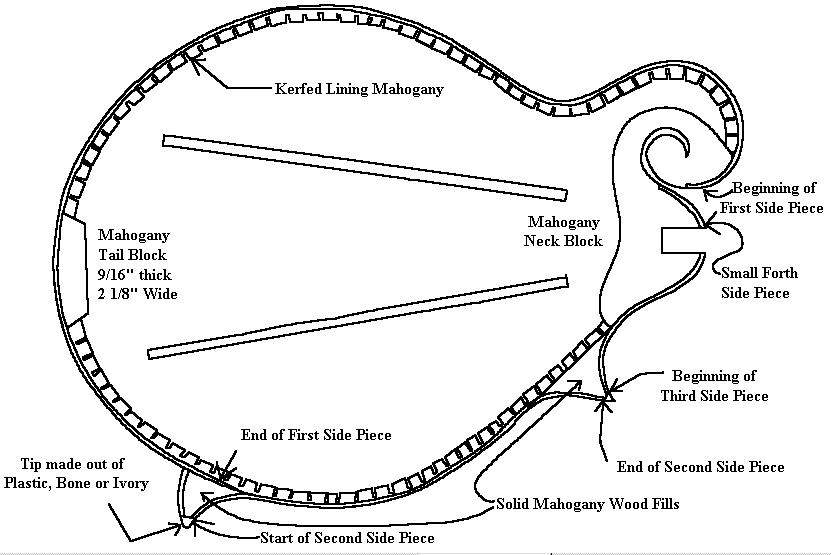
The Sides
By John Fisher
"The quality of a person's life is in direct proportion to their commitment to excellence, regardless of their chosen field of endeavor."--Vince Lombardi, 1913-1970, championship-winning football coach
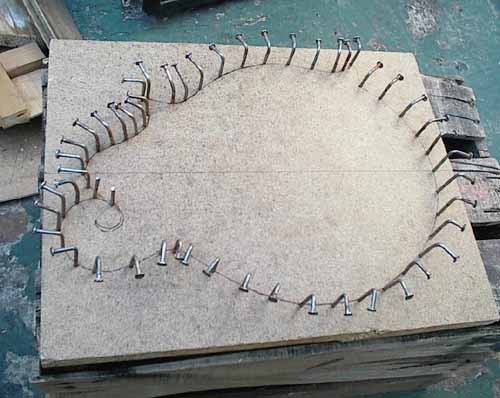
A Mandolin Makers Nightmare.
This is the mold that I used which is probably a mandolin makers nightmare as this is a very crude way of making a mold but it worked.. I figured that I was only going to make one mandolin or it will be a long time before I make another one so I didn't want to get into making a time consuming mold. I will not kid you by saying that this is the best way as a real mold is better, but it still worked fine for making 1 mandolin. I just simply drew the mandolin shape on a piece of pressed board and hammered 2 inch nails around 1 inch apart along the shape that is drawn. I bent the nails at about a 90 degree angle with a pair of vice grips. This will give me a bit of a guide when bending the sides to shape. The bent nails will also serve as hooks for holding rubber bands that I will stretch across the top to hold it on while gluing. I will show you more about this later.
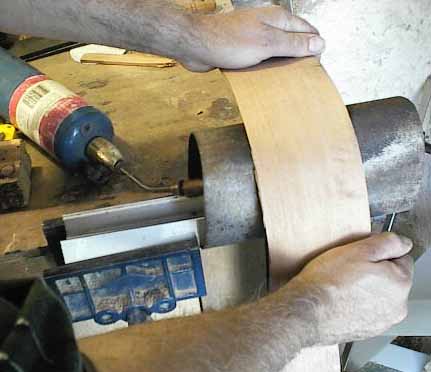
Here is a bending iron that I made out of on old piece of steel 4" pipe I got out of a junk yard. I crushed it a bit to make is oval for bending sharp corners. In this picture I am bending a side for a classical guitar that I was building, but I also used it for the mandolin. This bending iron will work good for just about any instrument where bending is needed but to make the very tight scroll on the mandolin I also had to use a smaller 1 1/2" pipe for bending. It was just a regular piece of 1 1/2" galvanized water pipe used for plumbing. In either case, the pipes are about 10" long. This is just a pipe with a piece of metal screwed to it so it can be held in a vice. The torch goes inside heating the pipe. It is also good to cover the other end of the pipe somehow. I have at times just wrapped tin foil around the end of the pipe to close it which helped to retain the heat more. These are crude methods that never the less work but there are commercial bending irons available which are much nicer. It is also better to use copper or brass pipes instead of steel ones as they conduct the heat much better.
I usually rock the wood back and forth on the hot pipe until it starts to bend. I sometimes periodically re-wet the wood with a paint brush and a can of water while working on bending it. You can't force it too much or it will break.
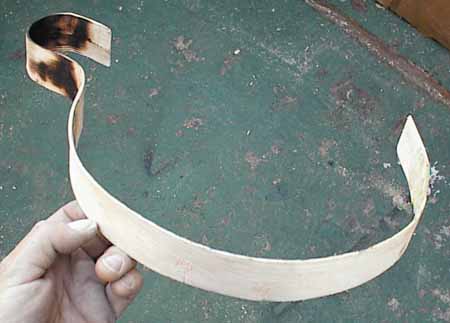
Here is my attempt to bend the first section of the sides. It wasn't so hard but I am ashamed to say that I should have soaked the wood in water more before bending it as I had some problems with scorching particularly around the sharp curves of the scroll area. It is good to soak the wood to be bent in water for at least 1/2 hour just before bending. If you follow that you will do better then I did. That was my mistake. One thing good is that you can pretty much sand off scorch marks if they are not too deep and I plan to paint the sides black anyway. Since there is a very sharp curve around the scroll it is also helpful to make that area thinner for easy bending. The general thickness of the sides was about 3/32" but I thinned it out more near the scroll. I made the bight of the sides at 1 3/8".
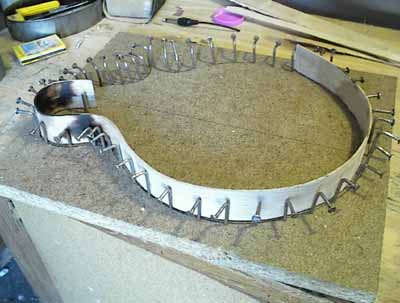
Here I am fitting the first piece of of the side in the mold. This first piece goes from the inside of the scroll, all away around to one of the "two" point blocks. It is good to start with a side piece a bit longer then what you will need and then after bending it into shape, cut off the excess length. I usually like to start bending the side in the middle of the piece and work my way out little by little until it is completed. The ideal is to get it bent to the exact shape of the mold without having to force it much into the mold.
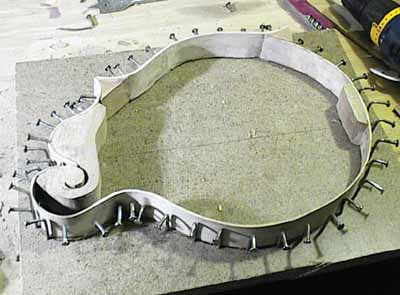
Here is the sides glued together to the neck block, point blocks and the tail block
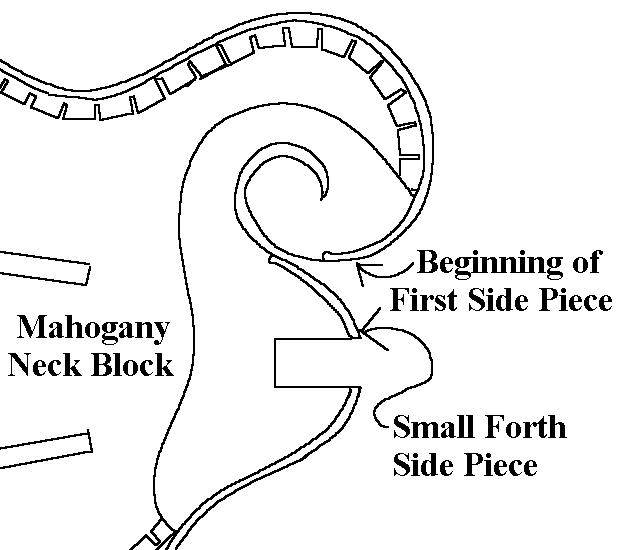
Here is an over all picture showing more details on how the sides are constructed.
Notice how the first side section thins out on the point block and the lining just goes over it. I used plastic for the very tip of the point block.
This is the second point block or wood fill area. The point blocks, tail block and neck block are all made of Mahogany.

Here is a closer look at the tail block
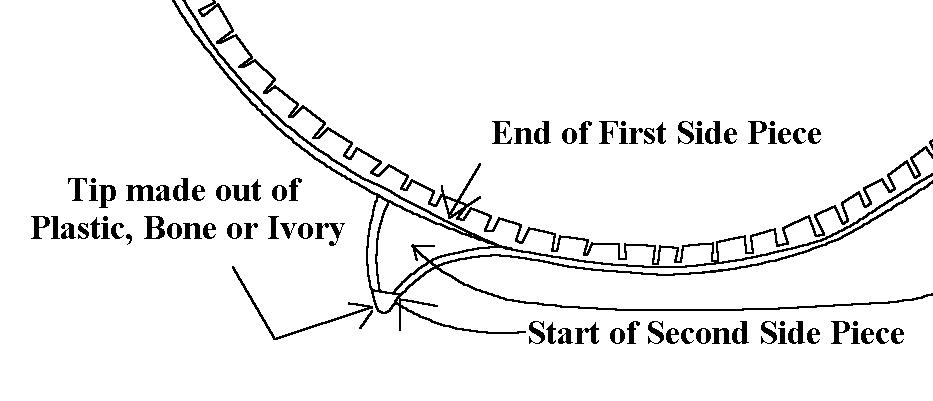
 \
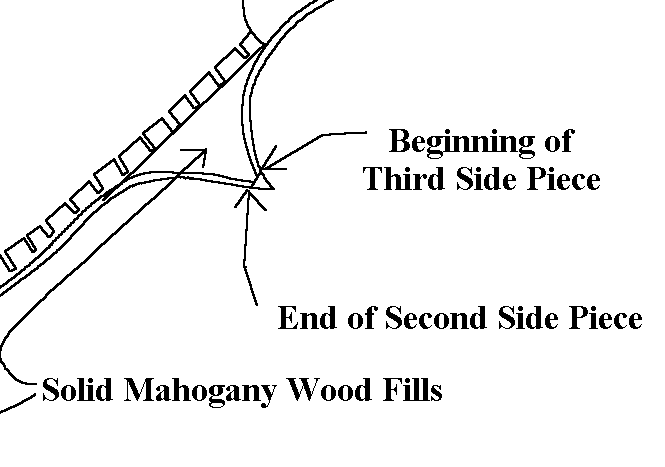
\
Here is showing some details at the neck block area. I will explain more later about making the neck joint. It can be done after the top is glued on but IT IS IMPORTANT!! to note that the neck will have to be joined to the body BEFORE the back is glued on.