The Linings
By John Fisher
A failure means you've put forth some effort. That's good. Failure gives you an opportunity to learn a better way to do it. That's positive. A failure teaches you something and adds to your experience. That's very helpful. Failure is an event, never a person; an attitude, not an outcome; a temporary inconvenience; a steppingstone. Our response to it determines just how helpful it can be."--Zig Ziglar
The purpose of the lining is to create a wide enough ledge on the sides for the top and bottom plates to be glued on. Also, to give enough of an edge to glue on the binding of the mandolin.
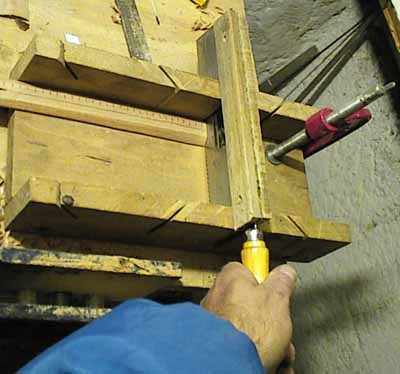
To make the linings, I used a common miter box to cut the grooves. I got a small back saw or dove tail saw and with a glue gun I glued wood on both sides of the blade as stops for each cut. The idea is to make cuts about every 1/4", and deep enough to give flexibility to the wood strip. Each cut is almost all the way through the wood but not quite. The saw stops at about 1/16th of an inch before going through the wood. If the lining happens to break in certain places while cutting or installing, it doesn't matter as the lining can be glued onto the mandolin sides in several pieces with no problem. The linings can be made out of Mahogany, Spruce, or Bass wood. I made mine out of Mahogany.
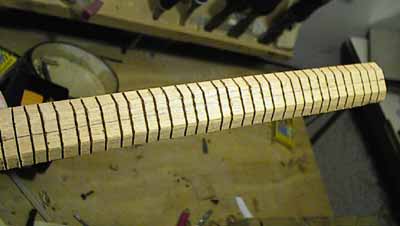
Here is a piece of the lining that I cut . It is basically a wood strip about 7/8" wide by 1/4" thick. I beveled the edges of the 2 sides with a plane. After making the cuts I then cut it down the middle to get 2 pieces of lining out of one. This is done to save time from all the cuts that you have to make by doing 2 strips at once.
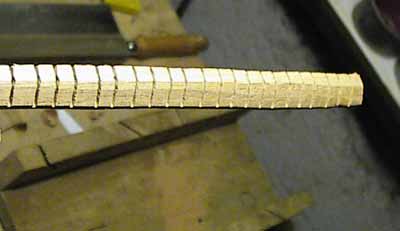
Here is a piece of the lining after it has been cut down the middle. After cut, it is about 3/8" by 1/4".
Here is the binding being glued on the sides with wood glue. I used a bunch of small clamps that I had and because I still didn't have enough clamps I used some cloths pegs as clamps.
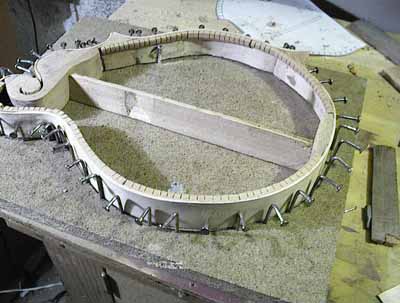
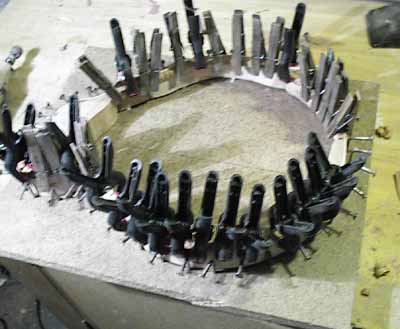
Here are the linings after they have been glued on the sides. I glued them on just slightly higher then the side walls and then sanded them flush with the walls giving a nice flat surface for the top to be glued on. After the top was glued on I did the same process for the back plate to be glued on. You will notice that in the middle is a stick. This was to keep the sides in the correct shape while gluing on the top plate.
Gluing the Top to the Sides
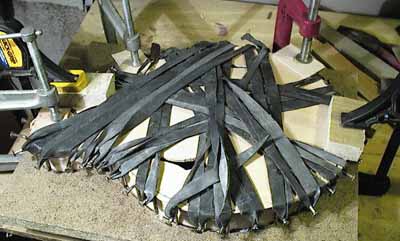
To glue the top on I used rubber bands that I cut from an old car tires inner tube. There is 2 ways to do this. One is to cut it in sections sideways like rings which make nice big thick elastic bands. You can also cut them on more of an angle to get bigger bands. The other way is to cut the inner tube long ways to make long strips which can be tied to the nail hooks in different directions. See how the nails that were bent into hooks are useful to grab the rubber bands? I went every which way to ensure a good tight fit for the top to glue on the sides. I also used clamps to clamp the neck and tail block areas clamps on the little point blocks. For most of the mandolin I just used normal carpenters wood glue. After I gluing the top on, I trimmed off the edges of the top with a rasp and thick sand paper.
When gluing the back on, the mold will not work because it is shaped just for the doing the top. What I did to glue the back on was put the back in place with the glue on and wrapped the bands around the whole body and also used the clamps again for the neck, tail and point blocks.
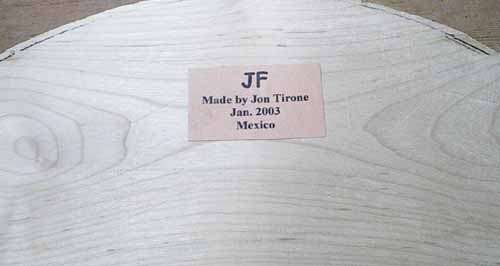
Just before gluing the back on is a good time to put the label on that will be seen through the F holes. I made this on the computer and was easily printed out. I made sure that it was positioned correctly to be seen through the top F hole.