Shaping the Body
By John Fisher
Every man is enthusiastic at times. One man has enthusiasm for 30 minutes--another man has it for 30 days, but it is the man who has it for 30 years who makes a success of life.
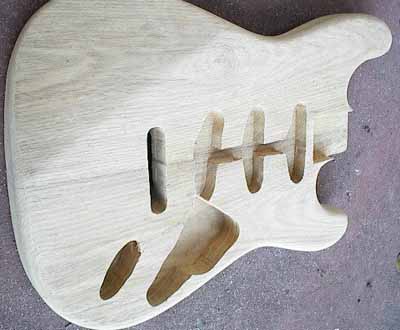
Here is the basic outline of the body which is 1-3/4" thick when finished
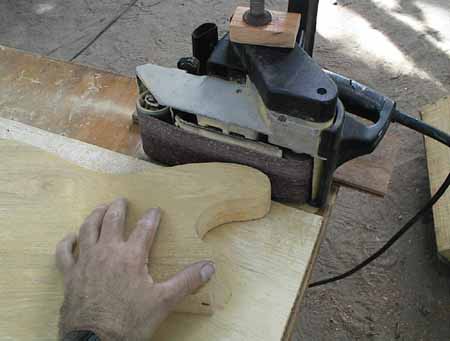
I don't have a disk sander with a table so I got the idea to mount my belt sander with a clamp and some blocks of wood at right angle to the table to sand the edge of the body square.
After the shape of the body was cut out I rounded the edges of the guitar body with a router
.

Here I am planing the bevel on the front of the body. I did all the routing free hand.
Building this guitar has been a real learning experience. I began to realizing that it is probably one of the most practical designs to build and market. Unlike other more elaborate guitars the Statocaster has no bindings to install, no inlays except just the black dots on the neck, a simple sticker on the head, a very simple bolt on neck which can easily be adjusted, The entire neck is made of simple slab cut 1" maple stock, the whole guitar is made of fairly economical readily available materials but the thing works and sounds great and is probably the most popular guitar in the whole world which has stood the test of time.
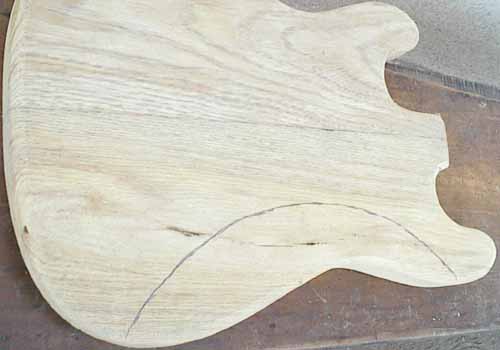
Here is a line drawn on the back of the guitar body to mark where I will make the rounded contoured area. I shaped this using a hand belt sander, a rasp and then finished it with a sanding block.
After all the shaping was done it was just a matter of doing a lot of hand sanding to get it nice.
Here is a shot of the front of the guitar body almost final sanded.

At this point I rubbed some quick drying sanding sealer over the body with a soft cloth. I do this to help me see if there are any bad unfinished areas that I need to work on and do some more sanding.
At this point I went though a dilemma. My son wanted his guitar to be solid black. The natural wood looked so beautiful that I didn't have the heart to paint it with black. It was like putting catsup on a nice steak. Yuk!! But even after I attempted to persuade him it was to no avail as he still insisted on it being black like "Eric Clapton's" guitar. Oh well! There are worse things in life.
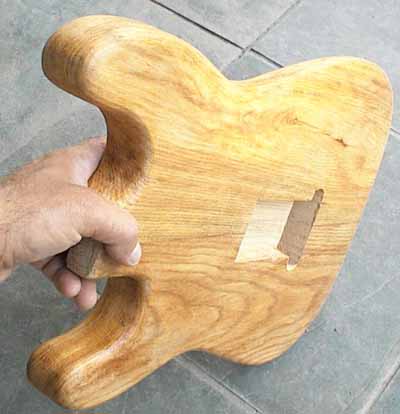
You can see where I routed out the back for the tremolo assembly.
OK! Take one more look at the back before I paint it black.
Please note that this wood has a very coarse open grain. Before painting it black I had to fill in the grain with grain filler. One nice think about painting it with a solid color is that any flaws could be filled in if necessary with wood putty or even auto body filler and sanded smooth before painting.
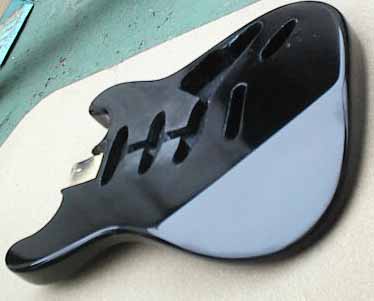
Here it is just painted black
I was able to use auto spay lacquer out of a spray can to do this. I do not normally recommend lacquer out of a spray can as I have generally had bad results. There might be some specialized brands that are good but the stuff that you get out of a common hardware store usually works terrible as it is gummy and never really gets good and hard. I did get good results using automotive spray lacquer for cars.
Back to Main Page