Making the Neck (part 3)
"The frets and dots"
By John Fisher
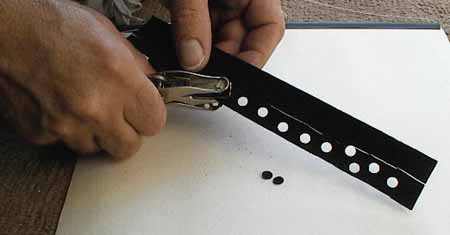
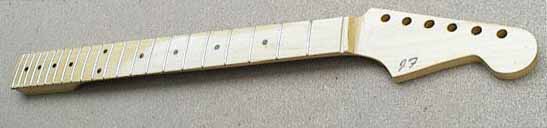
I found a simple way to make the black dots for the fret board. I got some black wood veneer and used a simple paper hole punch to make the dots. They just happened to be close to the right size. I realized later that I could have used just thin black plastic for this. Plastic would probably supply a cleaner cut but never the less it still came out good.
I simply drilled the holes on the fret board with a 1/4" drill bit and it was just right. I actually just made the holes by turning the bit by hand without a drill as not to make the holes too deep. This was easy as I just needed to go down only about 1mm. With some white glue mixed with some white sawdust from the blond fret board wood I glued in the dots. I tried to make sure that the dots were glued in flush with the surface if not slightly above. When they were dry I sanded the dots flush with the fret board. I also used a cabinet scraper as this (unlike sandpaper) will help the black scrapings not to stain the blond wood.
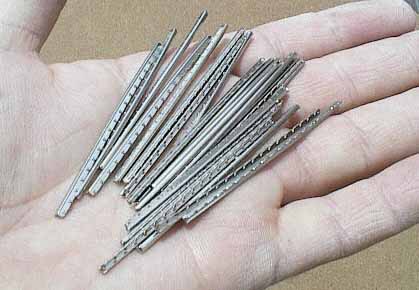
Fret wire usually comes in 2 forms. It comes in long strips or like pictured above in pre-cut pieces.
The frets that I used for my guitar were medium sized frets. There are different advantages to different types of frets. Taller frets give more grip to the strings and sustain while lower frets can help you to play faster.
Cutting the Fret Slots
I want to say that the following method that I used is not necessarily the best way to do frets but because of the lack of the many tools that are available this is how I did it.
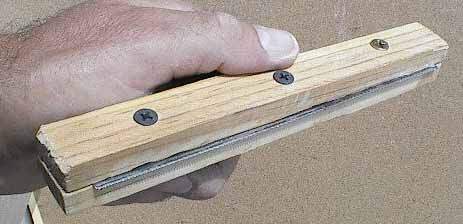
I didn't have an official fret saw so I made one out of a small hacksaw blade that I got from the hardware store. This all depends of the frets that are used but it just so happened that the mini hacksaw blade that I got worked. It was a slightly too wide a cut for the frets to stay in snug so I ground the sides of the teeth just a little bit to make the slots a bit narrower. If you do this too much you will have a hard time sawing the wood as the protruding teeth on the sides or the "way" of the saw helps the saw not to bind up when cutting. Never the less it managed to work. As you can see above, I screwed the blade between 2 blocks of wood to make a handle for the blade and the wood also served as a stop for the blade. I made the blade stick out just slightly more then what the depth of the fret tang is. (but not too much). Using this I can safely cut the slots without worrying about going too deep using this automatic stop.
The only real trick is that you have to make sure that you cut straight and that the slot is at right angle with the fret board. If the fret slot it not at right angle with the fret board, the fret will not seat properly which is imperative. There are special jigs to do this which I do not have. You can probably clamp 2 square blocks of wood on each side of the saw to ensure that it cuts straight but I just carefully did it freehand.
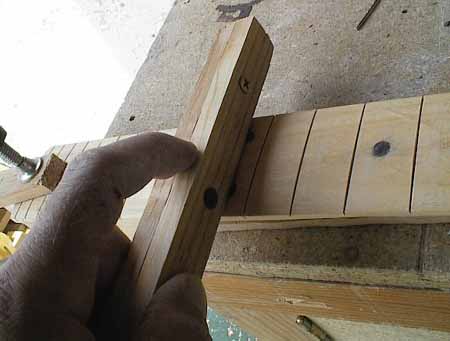
Here I am cutting the frets with my little home made saw.
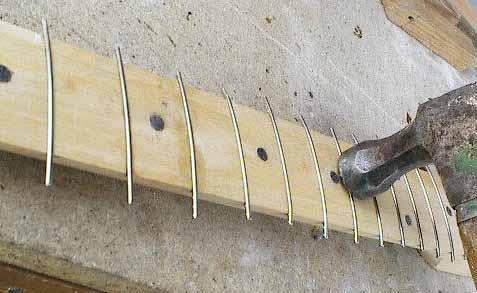
Here I am putting in the frets. There are handy machines to pre bend the frets before putting them in which I don't have. I just got 2 pairs of players and held the fret at each end and then bent the fret as carefully as possible just a bit more then the curvature of the fret board. There are several different preferences to putting in frets but the way I like is to make them go in snug (not too tight or too loose) with a bit of super glue squeezed into the slot. I just tap them in lightly with a hammer. I never bang them in hard or this will ruin things. The ideal is to get them all to seat nicely and as even as possible. The better that this goes the less fret leveling you will have to do later. I used just a normal hammer but it should have a nice smooth surface as not to bang up the frets.
After I put in the frets I cut off the extra length with a pair of nippers then filed it smooth. I then leveled the frets. To do this I got an aluminum carpentry level which has a very flat surface and I glued some 320 grit sandpaper to the flat edge. You can use a piece of flat wood or anything that is flat. You can also use a large flat file to do this. I put wood under the neck to support it so it remained straight while working. I then stroked back and forth across the frets, sanding the tops of the frets with the level. I did this just enough to where I could see that the tops of all the frets have been slightly sanded. If the frets that were inserted were done right you shouldn't have to do this very much. You will notice right away if some frets were higher then others. If you have to do a lot of sanding to reach all the tops of the frets, the frets will probably be lower then originally desired when the job is finished. You should be able to put the edge of a steel ruler on different areas of the frets and the ruler should stay flat. If the ruler rocks a bit on the frets, it is not flat enough.
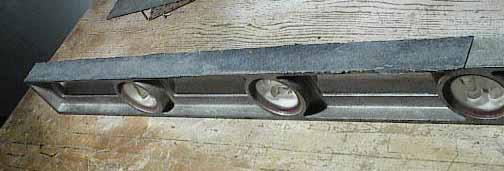
Here is the level I used to level the frets. Notice the sandpaper that I glued with contact cement to the edge.
After the frets were leveled I needed to crown them. This is where you make the tops of the frets that are now square from the leveling round again. For years I have done this with a normal triangle file in which I ground off one of the 3 corners as not to scratch the fret board then I would file each of the frets round again. I also put masking tape on the fret board as to protect it from the file. You can see how I did this in my "How to build a Les Paul" article. This takes time and you have to really work at it to make the frets good. I finally decided to break down and get a real fret file. The fret file, or the crowning file is concave so you can file the tops of the frets to make them round much easier then using the triangle file. Boy am I glad I invested in this file. To do frets is now so much easier and better. This file came with 3 attachments; for large, medium and small frets.
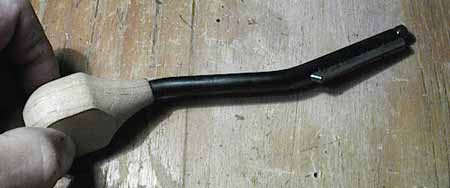
Here is my new fret file I got from "Stewart Macdonald"
After the frets are crowned, I also use the same file to smooth out the sharp ends of the frets. You should be able to run your hand up and down the frets and not feel any of the frets catch your hand. After this is done I got some #400 grit sandpaper and vertically sanded each fret. I then did the same thing with some #600 sand paper. It is important that the frets are nice and polished and shinny without any groves or little scratches in them or else you will certainly feel the frets grinding on the strings when you go to bend notes when playing.
After the guitar was done and the strings put on I was very pleased at the feel of the neck and I was able to get a real low action on the strings without any buzz. Ahh! It feels so good!