The Binding
By John Fisher
Let your religion be less of a theory and more of a love affair."-G. K. Chesterton (1874-1936), British writer
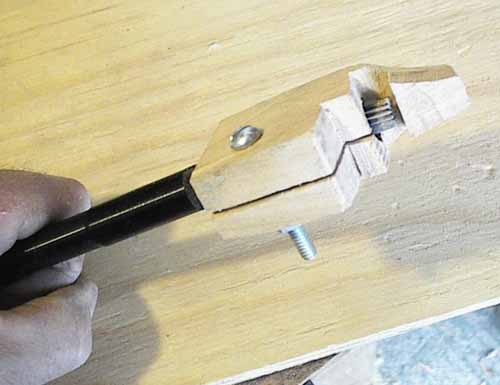
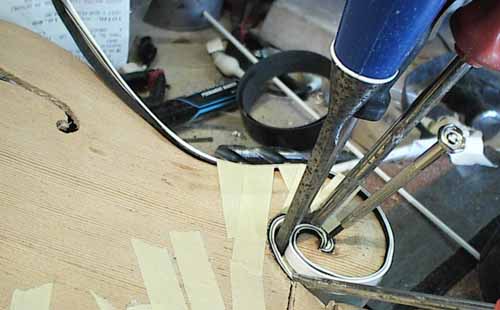
This is a picture of a rather crude device that I made to cut the binding groove for the top and back binding. It fits on the end of the flexible shaft attachment of a Dremil high speed drill. I made it out of maple. Although it was an experiment, it worked quite well. One thing that would have helped it to work better was the make the tang (that goes against the side of the mandolin while cutting) longer. Well, I'm just learning these things.
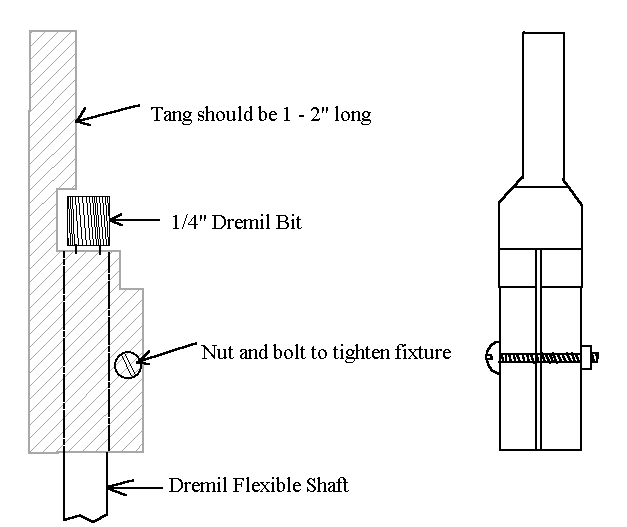
Here is a rough drawing to give you an idea of the thing I made to cut the binding channels. I made it out of maple and as like the drawing shows, the tang should be at least 1" or 2" long. This is the part that will go against the side of the mandolin or guitar. The nut and bolt will tighten the device onto the Dremil (high speed drill) flexible adaptor. The depth of the channel can be adjusted by loosening the nut and bolt and sliding the "Dremil Flexible Shaft" either way. The width of the channel can be adjusted by wrapping masking tape on the tang for cuts that are not as wide.
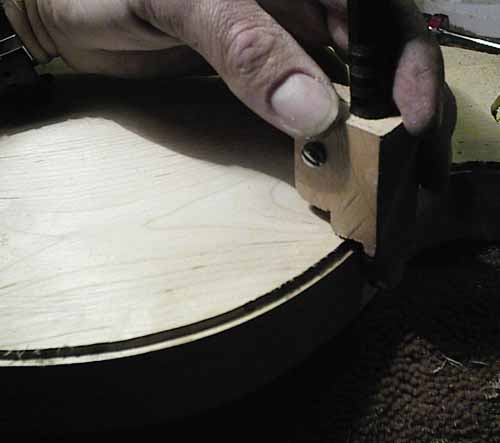
Here I am cutting the binding with my little home made device. This can be used for cutting any binding channels that you may need to do on other instruments as well. This is my first try at making this but I'm sure the design can probably be improved. It would benefit with a longer tank to hold it steadier against the side of the mandolin.

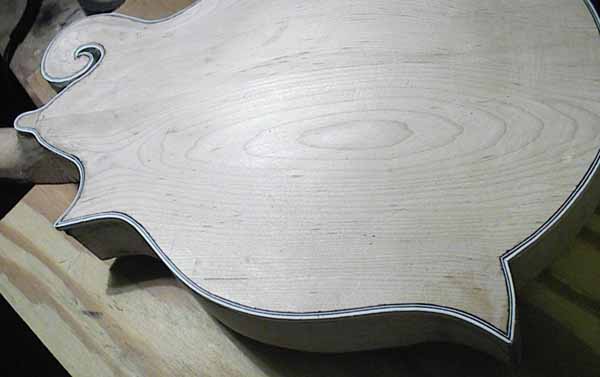
Here is the binding that I used for the mandolin. See my other article on "Alternative Binding Methods". This is a PVC material that I discovered at a place where they sell materials for making "Formica" tables. It comes is several colors but I managed to find it in black and white. I got tired of paying and lot in time and money for special ordering it from far away places so this is a very cheap and effective solution. You can buy a roll for under $2 that will do about 10 guitars or more. I always like to find readily, locally available materials when possible.
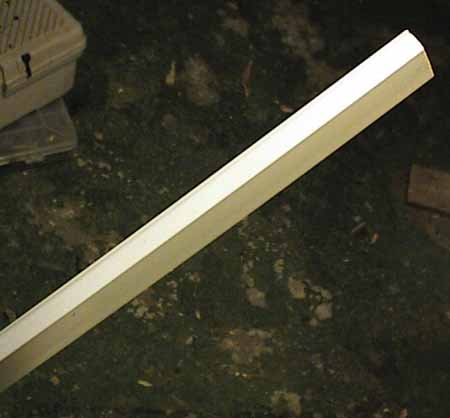
The above idea was great for the thin stripes needed but for the outer thicker binding I made a new discovery. I used these square PVC tubes that are used for putting wires in for mounting wires externally on the wall. I found them in an electrical supply store and they are very common here. I just cut it up in strips and one square PVC tube is enough to go a long way. This is also what I used to bind the fret board. The PVC is fairly flexible and in real difficult sharp curves, using a normal hair drier worked very well for bending it where necessary.
A very common thing is to use household glue (with an acetone bass) for gluing on the binding. This time I used normal super glue. I put glue on the binding strips and taped it in place, little by little using masking tape. It is important that the masking tape is pulled tight to insure the binding is glued on properly. It is even good in some cases to make the masking tape double for more strength. It is also good to cut the pieces of masking tape and place them on a piece of clean glass prior to starting the actual binding. This will make is much easier to work when you do the actual binding. I made the binding a little wider then needed, then I scraped it down flush to the body later after it dried. By far, the most difficult part was getting the binding to bend and glue into the scroll area. This is where I starting putting in the binding first. I shaped the ends so that they would line up nicely using a file. I then pre bent the sharp scroll area of the binding using a hair dryer. While gluing in the binding with the super glue, I held it in place with whatever I can find as you can see in the picture. It would be practical to maybe make some pre cut small wooden sticks for this.
Caution about Super Glue!!
I liked using super glue better then the household glue because it takes a lot less time to dry. The household glue can also make the binding distort and swell if too much is used and because of the long time it takes to dry (after the initial drying) it will continue to shrink the binding a bit in some cases if the binding is scraped to shape prematurely. In less then an hour the masking tape can be removed while using super glue. Super glue though is extremely dangerous, especially using it to this degree. You really have to be careful not to stick your fingers together while working with the binding. Perhaps it would be better to wear thin rubber gloves while using it. Even more important, is to wear safety glasses as it is very easy for the stuff to splash in your face and in your eyes which would be disastrous. Although I was wearing glasses, I have had super glue splash in my face and almost glue my lips together. No Joke!! Also when using it in large amounts as in gluing binding it is good to have good ventilation as the fumes are very strong.
After the Binding is dry and the masking tape is removed, I used a small scraper to scrap it down to the body. It is good to scrape it flat with the body and not attempt to round the edges of the finding at this point. After the scraping is done I usually round it slightly with sand paper. As you can see, it is quite a chore to do the binding for all these shapes and sharp corners. This is by far a more difficult instrument to bind then say a guitar.
Important note!!
It is important not to glue on the fret board until the binding is done or else the fret board will hinder greatly the cutting of the binding channel and the gluing in of the binding.
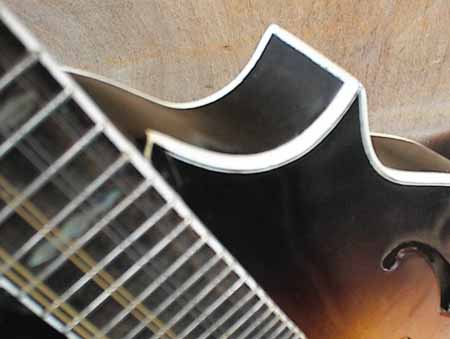
Here I am in the middle of putting the binding on the head. The different scrolls in the head make the binding somewhat more tedious then a simpler head stock.
For where the "points" are I used thicker plastic that I cut from a PVC sewer pipe to glue on the end.
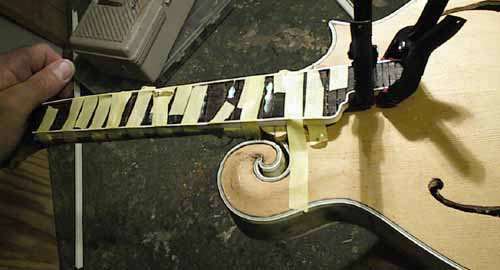
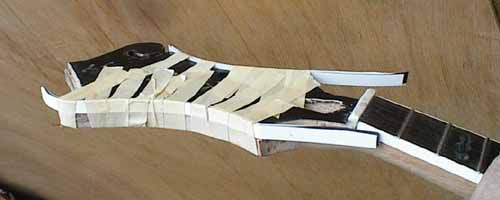
Here I am putting the binding around the fret board held with masking tape until the glue is dry. As you can see, I had to go around some sharp curves with the binding. To do so I used a normal hair dryer to bend the PVC binding into shape. I also used some small clamps to hold it in place as the clamps had a tighter grip then the masking tape in this case. You will note that the binding is put on the fret board "before" the frets are installed.
Attaching the Neck to the Body