
How I Fixed a Broken Guitar Head
(Part 2)
By John Fisher
(Jon Tirone)
I always find each new a problem or situation a challenge that something new can be learned. Following is an article on how I fixed a broken guitar head. I have seen different ways that people have done this with wooden dowels, pins and such but I believe that the method below leaves the guitar head attached to the neck just as strong as the original guitar if not stronger. Our band was out of town doing a gig when my partner slipped with his guitar on a gravel incline then "
crack!". Not a very pleasant experience for my partner. I finally said "cheer up, I'll try and fix it for ya!".
For interest sake here we are on our trip (our drummer in is not in the picture). Although I am a rocker at heart, this place wanted country music so we got into it. I am the old dude with the banjo. It was only moments later when Brazilian Tiago on the far left broke his guitar.
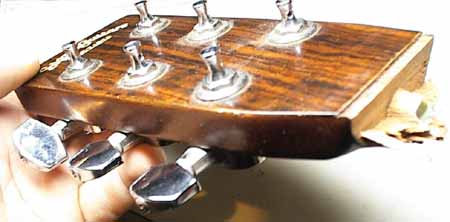
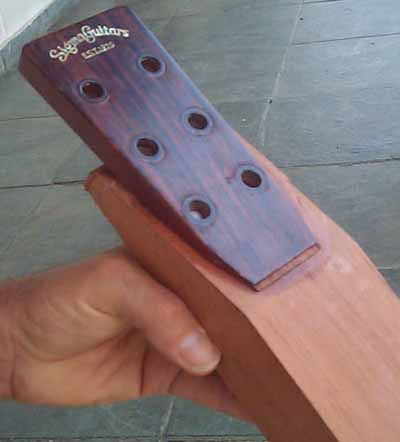
Here is the head that was broken. It was actually broken just about half way through but I then sawed the rest of the way through. Fortunately I was able to saw through right at were the nut is, leaving the face of the head in tact.
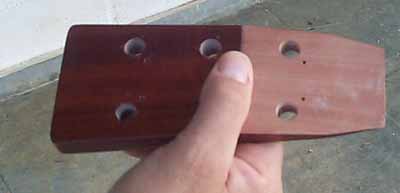
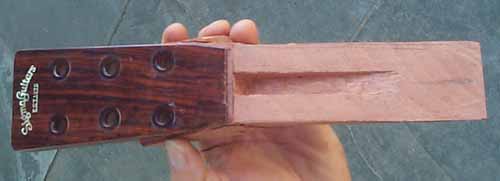
I decided that I would cut an angle about 4 inches down the neck and cut an angle on the head so that a piece of wood could be spliced in for very strong joint. Here you can see how I cut a bevel making it a flat surface to glue in a block of wood. It was important to get this surface real flat. I did this with a sanding block and then periodically checking it with a straight edge.
The thing that was most awkward was how to freely cut an angle down the neck with the truss rod in the way. Probable the most correct approach would have been to remove the fret board so that the truss rod could temporarily be removed. I wanted to avoid this very big extra step which would later involve re-gluing the fret board back on and re dressing the frets.
I thought I could try and cut around the truss rod with a wood chisel but the trick would be getting a very flat surface to glue to while the truss rod was still in place.
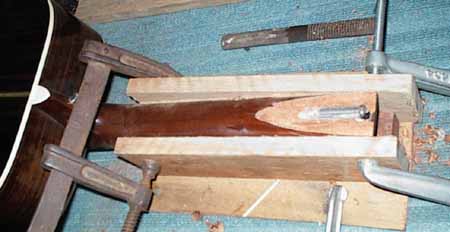
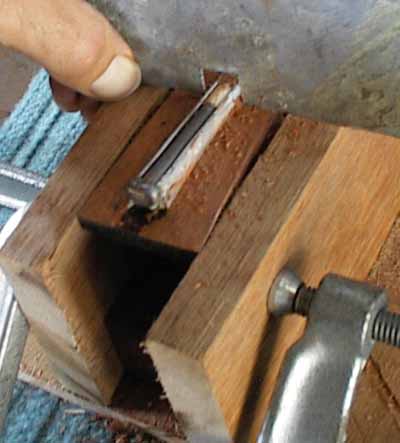
I tried making this simple wooded jig that would hold the neck on an angle as sort of a guide while I chiseled away the angle. This was very helpful to a point but the surface needed to be ultra flat so I needed to go a step further.
Here I am trying to chisel and rasp the wood away, using the wooden U support as a guide.
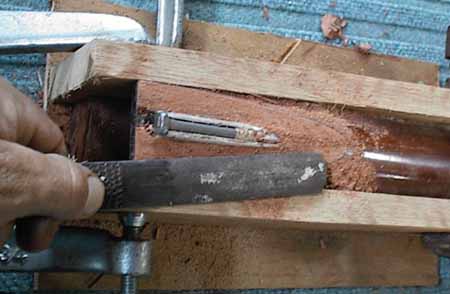
I even tried to use a piece of sheet metal that I made a groove in to scrape away the wood for a flat surface. This idea worked somewhat. The groove was made to clear the truss rod while scraping.
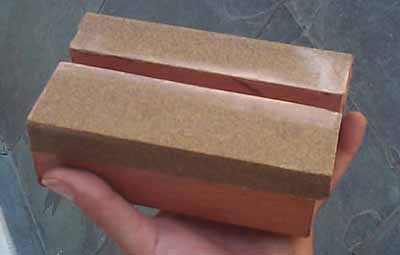
I got the idea that I could make this simple sanding block with a groove in it that would clear the truss rod while sanding back and forth. The flatness was periodically checked with a straight edge.
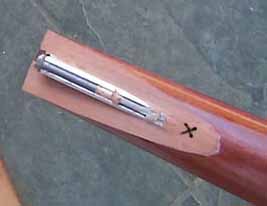
The sanding block worked very well but there was a small area that the grooved sanding block and the grooved metal scraper did not reach. In the picture above I marked that area with an "x". In that area I had to carefully chisel it away and carefully use a small sanding block, checking frequently with a straight edge.
.
Between using the wooden jig with a chisel, a rasp and the metal scraper, I finally got a flat surface that was satisfactory.
After I finished with the slanted cut on the neck and the slanted cut on the head I had to create out of a piece of mahogany the piece that would be the splice. After cutting the appropriate angle on the wood block I then had to make sure that the 2 surfaces that were to be glued were also flat.
Here is the block of wood that is glued to the angle on the head. The block is also angled to fit the neck of the guitar.
I then had to calculate and make a hole for the truss rod to fit into. This could have been done accurately by making an appropriate jig for a router to make the cut but I just did it with a chisel.

Here is the block of mahogany glued to the head and the neck. Although using wood glue will work very well for this job. I decided to use transparent epoxy glue for the joint. Not only does it harden fairly quickly and is strong, but one other advantage is that it will fill in any spaces or errors if you don’t have a perfect fit. The advantage of white polyvinyl wood glue as that it is good for not making the joint visible. It is important to try not to get any glue on the truss rod so that it will be able to move freely to do it’s job when adjustment is needed. It might help to rub a bit of soap or candle wax on the exposed truss rod so no glue will possibly stick to it.
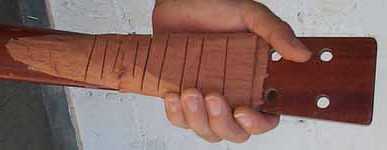
I started to whittle away the wood with a knife, chisel and a rasp. I made approximate depth cuts with a handsaw as a guide and as an aid in the carving. The grooves helped greatly not to accidentally tear into the wood too deep.
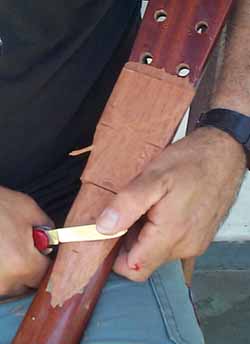
Here I am with most of it cut away with my trusty Swiss army knife. You have to be careful not to cut your self like I did. Do you see the blood on my finger? I would have used my belt sander to help in this but I didn't have it with me at the moment.
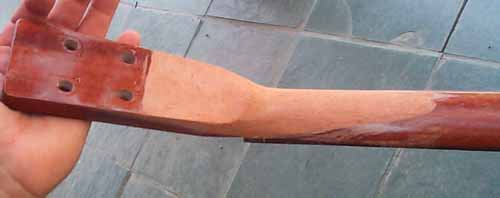
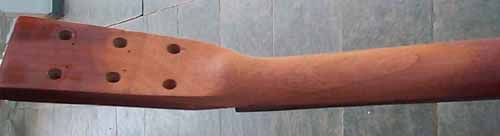
Here it is close to done. I will still have to re-drill the holes for 2 of the tuning pegs as you can see.
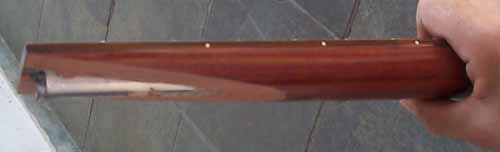
Here it is pretty much shaped and sanded. I left a little bump in the back of the head near where the nut would go to strengthen that part of the neck as this is normally the weakest point of the neck. I was happy about how well the wood that I spliced in matched the original wood . The color was pretty much the same.
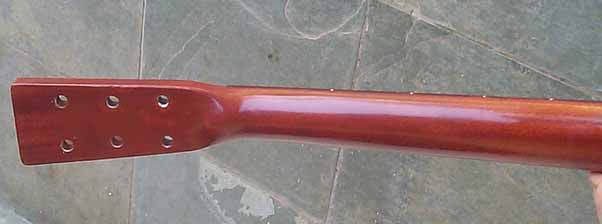
Well here is the neck after it was finished. I mixed in a bit of mahogany stain with the lacquer which matched very well just a little bit helped to cover any traces of the neck joint. I sanded the neck with different grades of wet sandpaper, starting with about #320 then working my way finer and finer until I reached #1500. At this point, I didn't have any rubbing compound on hand , so just to save the situation I used just normal tooth past which seemed to work good enough to get me through this job. When finished it was very hard to tell that the guitar was ever repaired as you would need to look very closely to see any joint in the wood. My Friend was very pleased.
John Fisher
Back To Main Page