How I Fixed a Broken Guitar Head
By John Fisher
My wife gave me a discarded broken acoustic guitar she found that was trashed thinking that I might want to use it for parts. It was a Epiphone PR 350 model. The head was completely broken off. Except for that, the guitar was in very good condition. No scratches, nothing warped and the finish was nice. This is actually a pretty cheap guitar, probably about $250 new. I started to look at it thinking what can I possibly get out of it? The tuners were gone off the broken head and about all I could possibly get off it was the truss rod, the bridge and maybe the fret board. (Big deal!). It wasn't such a great guitar to where I wanted to put a lot of time and money into but then I thought, why not try to fix it as a learning experience and then when it is finished at least the guitar might do somebody some good.
Preparing the Neck
The fact that the head was broken off right at the nut made it impractical to try to re- use the old head as there was not a good enough surface to re-glue it on.
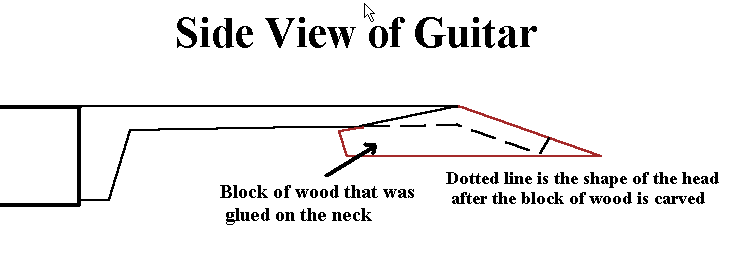
I needed to make a diagonal cut at least 4 inches down the neck in order to supply a sufficient surface to glue a new block of wood on in order to carve out the new head.
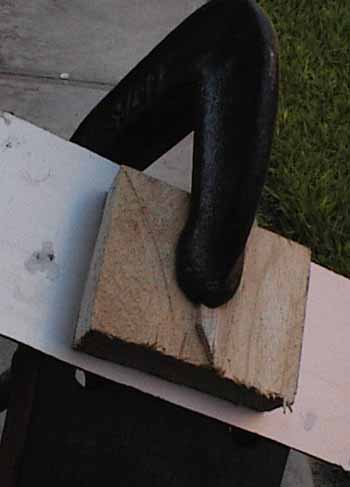
I'm sorry to say that I don't have any photos of the early stages of this project. Above is a childlike illustration of how I glued a block of wood to the neck. I first needed to remove the fret board from the neck in order to remove the truss rod. This was necessary in order to be able to freely cut the diagonal on the neck. To remove the fret board I got a hot knife heated from the gas stove and little by little wedged the fret board from the neck. At the same time I applied hot water in the crack between the fret board and the neck until it little by little came loose.
After I cut the diagonal that ran about 4 or 5 inches down the neck I made sure that the surface was very flat to match the flat surface of the block of wood. If the surfaces are nice and flat it will never come apart after glued. I used carpenters wood glue but you can use epoxy glue which would work very well for this.
After the block was glued I re routed the channel for the truss rod, then making sure the neck was flat, I re-glued the fret board back on. After that I began to shape the neck and the new head carving it with a knife and a wood rasp.
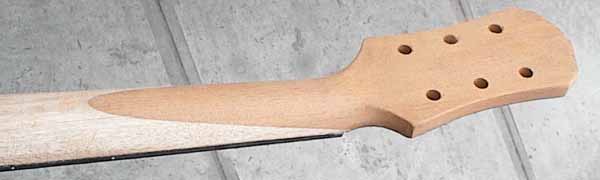
Here is the neck and the new head after I shaped it. The wood that I used for the block of wood was mahogany which is all that I had. The original wood that was used for the guitar was quite a bit more inferior. I don't even know what it was but it seemed cheap. Because of the obvious difference in the 2 woods, I later used quite a bit of stain when finishing in order to cover up this detail.
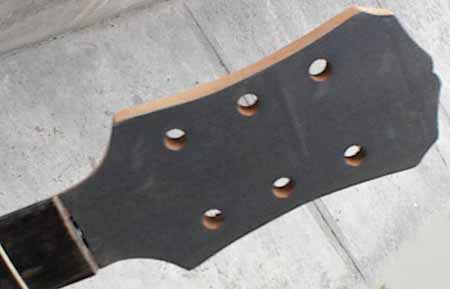
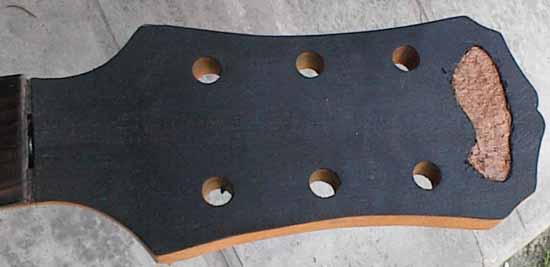
Here is the front of the head where I glued on a piece of black veneer. Because the truss rod is adjusted at the head, I later cut out the veneer in the area where the allan wrench would go to access the truss rod later covered with a plastic plate.
It seems at this point that there has been major progress but now there was the detail of the inlays.
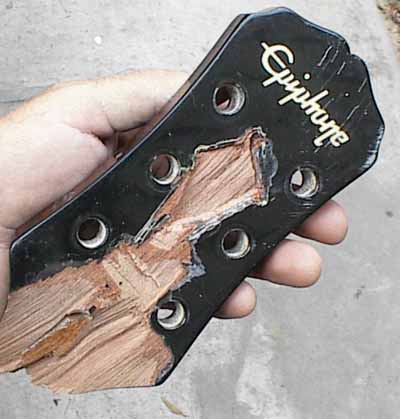
Here is the old broken head. This was a real learning experience as I was able to get an idea what they use for materials on these cheap guitars. I wanted to try and somehow remove the inlays from the old head and then transplant them into the new head. Not knowing what I was doing, when I tried to remove the Epiphone flower design from the head, I realized too late that it was paper thin and I accidentally destroyed it. You can see in the middle of the head where I butchered it up. I didn't want to make the same mistake with the even more delicate "Epiphone" insignia so what was I to do?
I once fixed an old 1960 Gibson ES175 that had the same problem with the broken head stock in the same manner and I meticulously re inlayed the Gibson lettering on the head from scratch. It came out very good and you couldn't tell I did it but it was sure a lot of work. I wasn't about to go to the same trouble for this cheap guitar so I had a different idea.
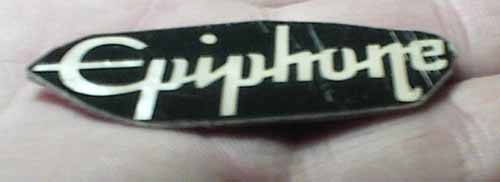
I got the idea to cut out the inlay with the existing wood around it and then sand it until it was about as thin as a piece of veneer then insert it into the new head.
.
I then traced the thin waffer (kind of like a decal) in the new head then carved out the area on the new head where it would then be inserted.
Although this idea is not perfect, because the black veneer was the same color as the old head, the way it matched up was acceptable.
Gluing in the Decal
When gluing inlays in black ebony or repairing any other surfaces that are jet black I have found 3 ways of using glue to fill holes or do patching.
#1- Mix white polyvinyl glue with the black sawdust of the same wood. (the best method)
#2- Mix white glue with black water soluble ink. I have even seen white glue already prepared this way in different colors in art supply stores.
#3- Mix the white glue with ground up charcoal.
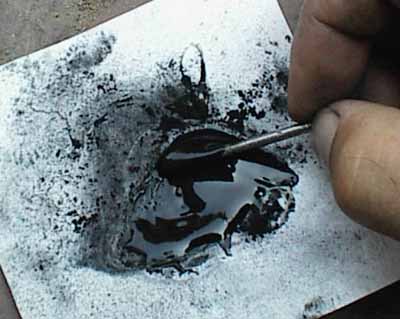
Here I am mixing white glue with charcoal for this project.
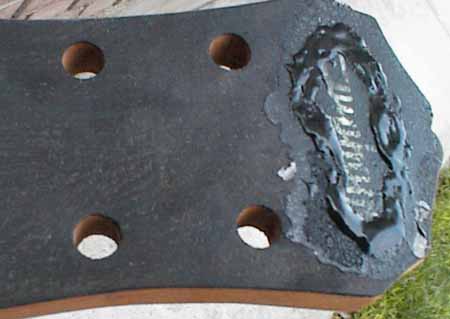
I made sure the thickness of the wafer and the hole were pretty precise in order to glue the decal in as flat as possible. I first glued it in with a bit of glue just to get it positioned correctly then clamped it so it would remain flat. (See picture below) After it was glued in correctly I went back and built up a lot of glue around the decal in order to fill in any imperfections or holes. I had to do this more then once and let it dry well in between coats as the white glue would always shrink to a certain extent. I was not afraid to put plenty on and sand it down in between coats. The idea is to eventually sand it down smooth and flat with the rest of the head.
Here I clamped the decal flat with a piece of sheet aluminum (so it wouldn't stick to the glue) and then a block of wood.
Here is the finished head. It is not perfect and there were a few slight witness marks, but never the less it was a success. Nobody was able to tell that it was not the original head.

Well, it has been a fun and rewarding project and here is my son Isaac with his new guitar