Making the Resonator
By
John Fisher
(Jon
Tirone)
John Wesley had a terrible wife. She tormented him beyond measure. But he said that he attributed most of his success to his wife--that she kept him on his knees and because he was kept on his knees, he had the victory.
The basic function of the resonator, which is on the
back of the banjo is to project the sound forward. It also makes the banjo
louder and I have found that it gives a bit more depth to the tone of the
banjo. Not all banjos have resonators. Most of the old time banjos that are
used for the claw hammer style don’t have resonators.
This was indeed a
challenge to make as there are a few construction details that are a bit more
complicated then normal everyday carpentry. One of the problems to be faced
with was " how do you make the curved back?" I believe that in a
banjo factory they would normally get plywood and press it in a mold to make
the round back. It is obvious that I didn't have those facilities.
I did experiment by
getting plywood and trying to make it rounded by pushing it against a cooking
pot with a rounded bottom that was being heated upside down on the burner of a
gas stove. This was difficult but it did work somewhat, but I was not happy
about using low-grade plywood for the back, as that is all that I had.
Another idea was to
glue wood together and turn it on a wood lathe. I believe that this would have
worked very well but I didn't have a wood lathe available.
I did have a router
so that is what I used as you will see below.
I got some mahogany from a garage sale down the road
for almost nothing. I cut the board in half and sanded the edges of the 2
pieces so they would fit seamlessly and then glued it together to make a
14" wide board 1” thick.
Determining where the center is, I then chiseled the
profile of the curvature of the domed back from the center to the outer edge.
This will help guide me in my depths of the cuts I will make with the router.
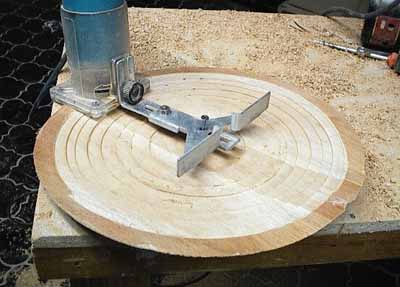
Here is the finished groove that will serve as a
pattern for the router to follow. You will notice that I started to router the
outside perimeter of the resonator first. The depth of this first groove is
about 3/4" deep in the 7/8" thick board.
Here I am measuring the depth of the first cut.
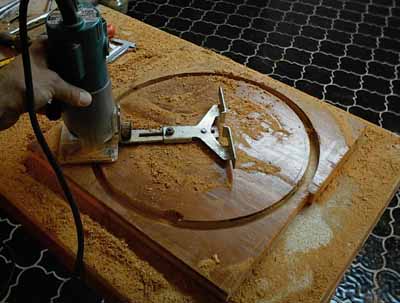
Here is the router attached to a metal adjustable
arm attached to the center of the wood. I went around in several passes at
different depths with the router. After doing a cut I would adjust the arm a
bit shorter and the depth a bit shallower using the chiseled groove as my guide
for the depth of cut each time.
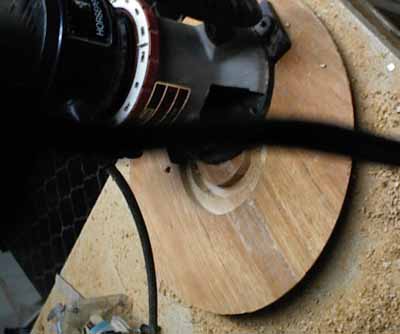
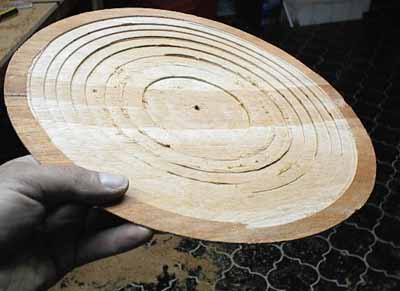
As you can see I am gradually moving towards the
center with each cut and going up like stairs until I reach the center. This
will eventually be the domed back of the resonator. I am using a 1/2" flat
router bit and moving in a little less then 1/2'' at a time.

Here is the completed routed domed back. I now have
to smooth it out and get out the rough grooves left by the router. I did this
with a chisel, a scraper and coarse sand paper.
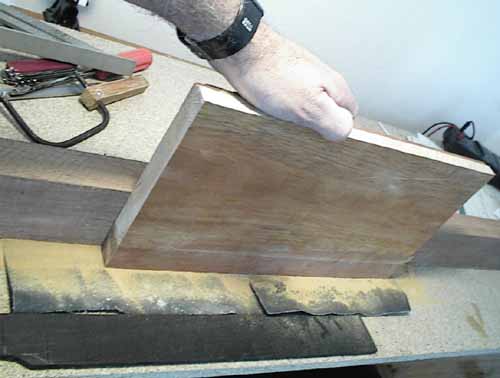
I still have to smooth it out more, which I will do
with thick sand paper and a scraper but for now, I cut out the wasted wood on
the outside leaving the round china hat shaped piece of wood.
After making one side of the wood dome shaped I
turned it over and begun to router the concave shape of the inside. It was
important to screw the center guide not only through the center of the wood but
I screwed it into the wooden bench in order to hold the wood as steady as
possible. If not, the router would have a tendency to start spinning the wood
around. I made the first cut as close to the center as possible and worked my
way to where the thickness of the dish will be 1/8" to 3/16" thick.
You have to be really careful not to go to deep to where you cut through the
other side. When making deep cuts such as this, it is important not to try and
take it all off at once but make shallower cuts first. This helps the router
not to grab the wood too fast to where it gets out of control to where you have
a disaster. In general I believe that if I had a wood lathe, this phase of the
project would have been a lot easier.
As you can see, I worked my way little by little
towards the outer edge making the inside concave
I chiseled, scraped and sanded the inside of the
dome until it was smooth creating a wooden dish about 1/8" to 3/16"
thick.