The Neck
(Part 3)
By John Fisher
(Jon Tirone)
There are four steps to accomplishment; Plan purposefully. Prepare prayerfully. Proceed positively. Pursue persistently.
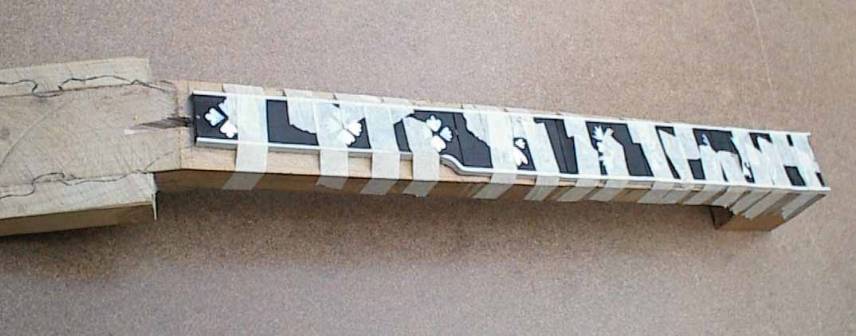
After the inlays were done and I was sure that the neck was flat I made sure that the fret slots were cut out good before gluing on the binding. I cut out the binding for the fret board with a hack saw from a piece of 4 inch plastic PVC sewer pipe. See my Les Paul project for more details on how I do this. You can see that where the fifth string tuning peg will go, there is a sharp bend in the plastic. I heated the plastic very briefly with a candle to bend this into shape. You have to be careful as it melts very easily. I then glued the binding on with household glue which has an acetone base. I then held it with masking tape and let it dry for at least 1 day. After the glued binding was dry, I then scraped and sanded the plastic flush with the fret board.
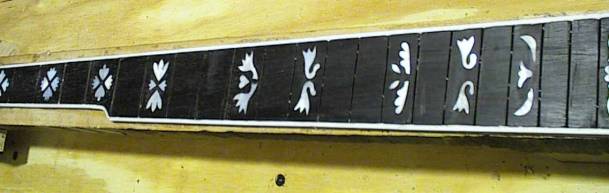
Here it is just after the binding was glued on. Now for the fun part of starting to shape the neck.
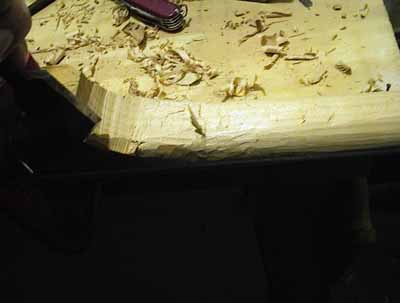
I just hacked away any way possible with a chisel, knife or a rasp. At one point I used a belt sander which was very helpful but it broke in the middle of this project.
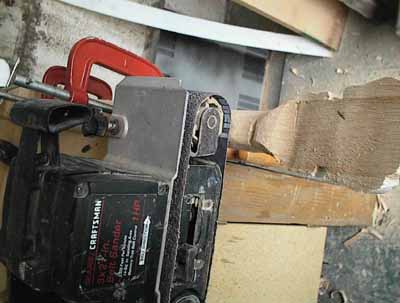
Here I am using a belt sander to help round the neck just before my sander broke.
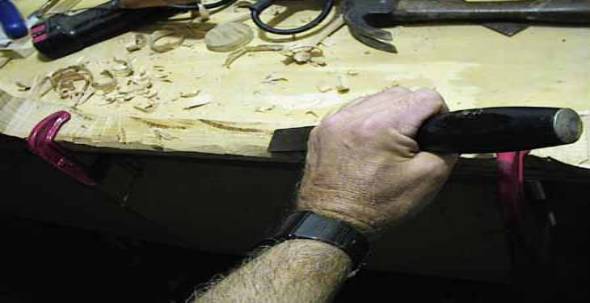
It’s a little hard to see, but I am carving the heel with a chisel.
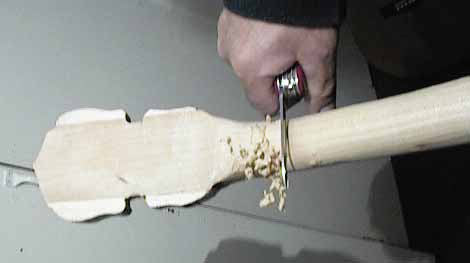
My good old Swiss army knife was really handy for not only cutting but also scraping.
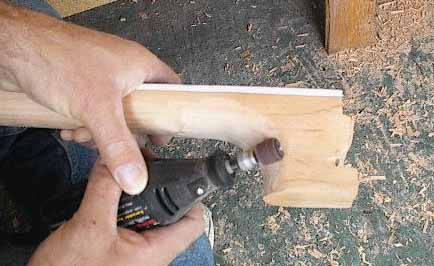
My Dremel high speed drill tool with a sanding wheel turned out to be quite useful in helping to shape the heel. The heel tapered down to about 1 1/8" wide on the bottom of the heel. When shaping the neck near the plastic binding, the plastic was thick enough that I sanded the plastic down about to where it was about half of the original thickness of the plastic. As you can see, I had to work on making an odd shape for the heel to conform to the body of the banjo.
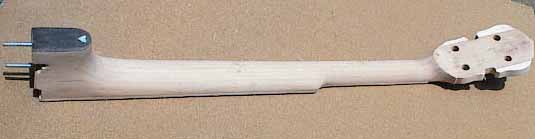
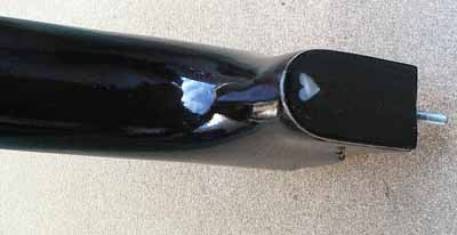
Here is the neck close to being finished. I still have to work on the head more, but I will cover that in another chapter. As you can see I sandwiched some veneer on the heel. I put black, white, black veneer together to decorate the heel. I then inlayed a little heart on it. You can see the 3/16" threaded rods sticking out of the heel that will go into the wooden rim of the banjo pot.

This is to give you an idea how the neck turned out. After final sanding with #220 grid sandpaper, I applied stain. The stain was a mixture of Mahogany and walnut alcohol stain. I applied it by hand with a soft cotton cloth until I got it pretty dark. I first masked the fret board binding with masking tape. In some places I accidentally got some stain on the plastic binding, so I scraped it off using a 90 degree angle on a knife blade being real careful not to go into the stained finish area.
After getting the neck stained the way I want, I finished it with automotive clear acrylic lacquer from a spray can.
Here is a glimpse of the heel before we go onto the next chapter.
Obstacles are those
frightful things you see when you take your eyes off the goal.